Evie's guide to playing The Sims 2 on Windows 10 or higher!! 💙✨
UPDATE: THE INSTALLATION PORTION OF THIS GUIDE IS NOW OBSOLETE, DUE TO EA'S COPYRIGHT SHENANIGANS. THE FIXES AND CC SECTIONS CAN STILL BE USEFUL, BUT YOU CAN NO LONGER INSTALL THE GAME USING THIS GUIDE.
NOTES: not troubleshooted for mac computers running bootcamp or any computer running linux! sorry for the inconvenience!if anyone has any information about running TS2 on these operating systems, especially with CC/mods, please let me know! i'd love to link any (preferably recent) tutorials you might have!credits have always been listed at the end of the tutorial, but i'll put them here as well, for convenience: OSAB, PleasantSims, ACottonSock, Wee Albet, LazyDuchess, and this (deleted) Reddit user.if you intend to use specific parts of this tutorial, such as specific phrasing, please give me credit, (especially if you have a larger platform) just like I have credited those whose tutorials i used to create this carrd.find me on tumblr: @iowafashionweekbegins/@funkytowncatmp4
or on twitter @iowafashionweek/@funkytowncatmp4
feel free to send me an ask on tumblr if you have any questions!if you appreciate my work, and you'd like to leave a tip, here is my ko-fi!
Last updated: September 27, 2024
Installing The Sims 2 !! 💙✨
STEP ONE:
Download the TS2 Starter Pack web installer here.
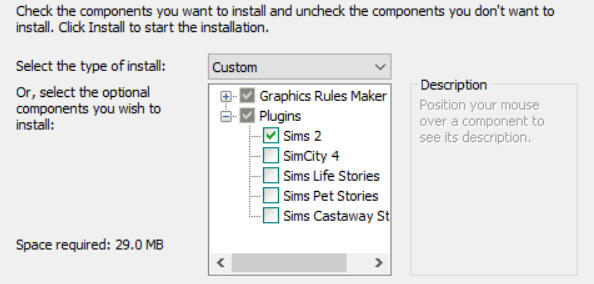
Scroll down until you see: "TS2StarterPack.WebInstaller.x64.exe" and download that file.Open the file once it has downloaded, If it says that Windows has protected your PC, choose to run it anyway. Follow the instructions as they pop up.Graphics Rules Maker, Sim Shadow Fix, and LD Bright CAS Fix should be checked in the "Choose Components" section.I personally also check the "DXVK" option. It is recommended that you select it if you have a modern AMD graphics card (RX 400+). Otherwise, only select it if you have Vulkan-capable hardware or find it to be necessary for gameplay.

If you did not select DXVK and find your game crashing a lot, there are instructions to install it in the "Essential Fixes" section on this carrd. Once you've selected everything, click "Install".The process may take a while and sometimes crashes. If it crashes, simply close the installer with task manager and try again.After it is finished, Graphics Rules Maker can then be installed. Go through the installation steps until you get to the "Choose Components" section.In the “Game” dropdown box, select “The Sims 2". Then go to the "Path" section, and go to "Program Files (x86) / The Sims 2 Starter Pack". It should appear as shown:
After it is finished installing, check "Run Graphics Rules Maker", and then finish. (otherwise, you'll have to find it in your specified installation folder and run as administrator)When you run Graphics Rules Maker, you will be presented with a screen that looks something like this:
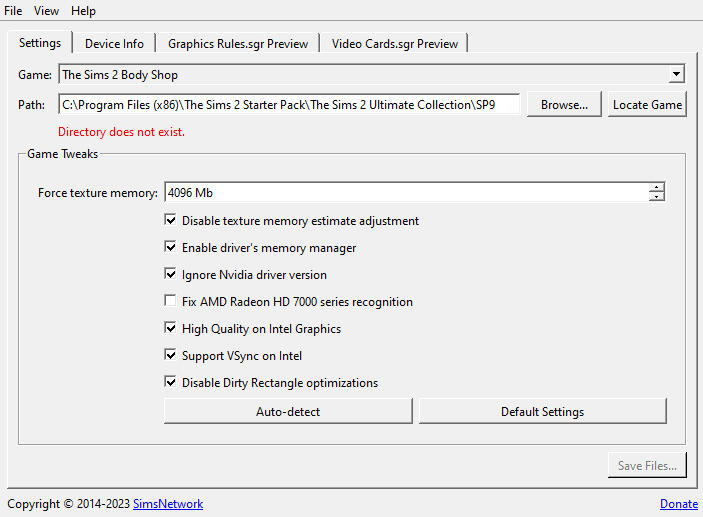
In the "Game" dropdown menu, select "The Sims 2".In the "Path" menu, make sure the path is set to “C:\Program Files (x86)\The Sims 2 Starter Pack”.After this, it will say that the game has been found, and that the video cards database has been located.

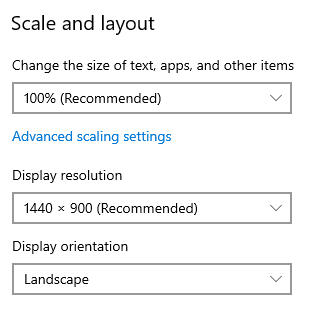
Click the "Auto-detect" button at the bottom of the program, and it will automatically input the texture memory and tweaks for your system.Make sure that the option for "Disable Sim Shadows" is UNCHECKED, and "Disable Dirty Rectangle optimizations" is CHECKED.The texture memory will usually be estimated at 4096. This is known as the 4GB patch, and helps reduce crashing. You can also apply the 4GB patch when opening Sims2RPCSettings.Set both the “Default Resolution” and “Max Resolution” dropdowns to match your monitor's resolution, or the highest option on the list.To find your resolution, go to your desktop and right-click and select "Display Settings".. Scroll to "Scale and Layout", and then "Display Resolution". There, you will find the resolution of your monitor.
Save your changes by clicking “Save files...” at the bottom right. Click “Yes” if it asks you to add your graphics card to the database.If you get an error while saving files, make sure you’ve run the program as administrator and check that your game folder has administrator permissions.Next, go back to your Sims 2 Starter Pack installation. If you chose to install DXVK, you should get a pop-up that looks like this: (don't worry about this step if you didn't choose to install DXVK)
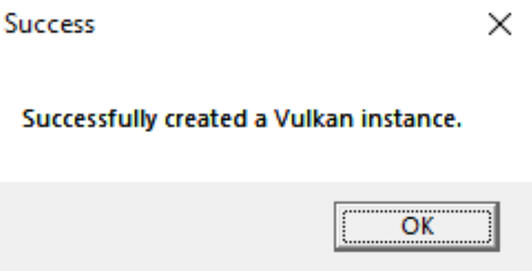
After you click "OK", a second pop-up should eventually appear, asking you if you received the previous pop-up. If you received the previous pop-up, click "Yes", If you did NOT receive the previous pop up, click "No".Eventually, the installation will finish, and it will prompt you to set up your graphics settings, if you happened to skip setting up Graphics Rules Maker. If you check the box, it will redirect you to OSAB's instructions document (which has been heavily referenced in this carrd) with similar instructions. Now, your game has officially been installed!"Sims2RPC" and "Sims2RPCSettings" will now appear on your desktop, ready to use whenever you want!Sims2RPC runs the game, and Sims2RPCSettings allows you to change various graphics and gameplay settings, including applying the 4GB patch.Now that the basic setup is complete, let's move on to some fixes that I consider to be essential for gameplay.
Essential Fixes !! 💙✨
INSTALLING THE DXVK FIX (if your computer allows it, and you didn't install it before)
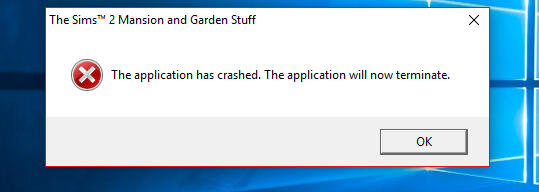
When installing DXVK, it is recommended that you only install it if you have a modern AMD graphics card (RX 400+). Otherwise, only install it if you have Vulkan-capable hardware or find it to be necessary for gameplay. You can download it here, scroll down and choose "dxvk-2.4.tar.gz". (or whatever happens to be the latest version at the time you are installing it)Extract the files with a program like 7Zip or WinRAR. Inside you will find two folders-- choose the "x32" folder and copy everything inside that folder to the location of your Sims 2 installation, aka "Program Files (x86) / The Sims 2 Starter Pack / Fun with Pets / SP9 / TSBin".And now you have finished installing the DXVK fix!! For me, this fix has dramatically reduced crashes in my game, so I highly recommend installing it if you find that your game is crashing often and that you have the recommended specifications.
PINK FLASHING FIX (aka The Pink Soup)
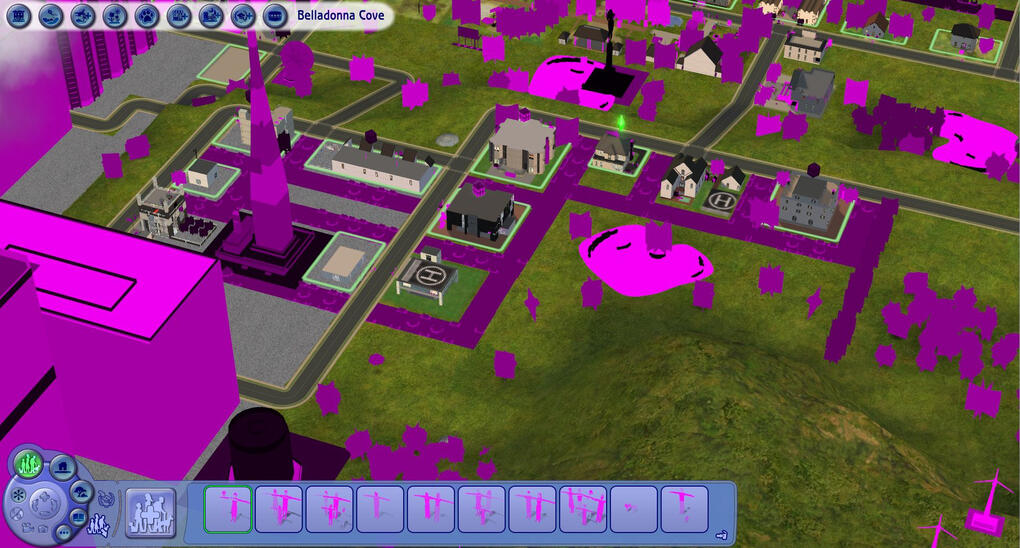
The pink flashing has plagued TS2 players for many years, and has often made their games almost unplayable, but fortunately, we now have a fix for it!Download LazyDuchess's Pink Flashing Fix here. As it says in the post, to install the fix with Sims 2 RPC, go to (again): "Program Files (x86) / The Sims 2 Starter Pack / Fun with Pets / SP9 / TSBin", and create a folder called "mods". Place the NoErrorVisualization.asi file into that folder, and your game should, mostly, be free of pink flashing and misery.Here are some other fixes if this one doesn't work for you!
INCREASING RESOLUTION
First, you will need to find your Graphics Rules.sgr file. You will find it in "Program Files (x86) / The Sims 2 Starter Pack / Fun with Pets / SP9 / TSData / Res / Config".Open the file with Notepad. Near the top of the file, you will see a section with the lines:"seti Low 1
seti Medium 2
seti High 3"Edit the text in the file so that each of those lines has a 3 at the end of it. It should look like this when you are done:"seti Low 3
seti Medium 3
seti High 3"Next, use Ctrl+F to find "ScreenModeResolution" (no spaces or quotation marks) in the file. You should find yourself in the section that looks like this:
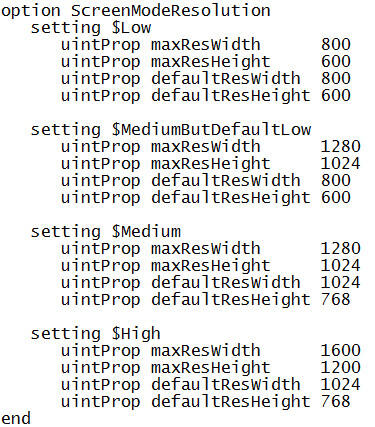
Now, you must know your monitor's resolution/dimensions for this next step. To find your resolution, as stated in the installation section, go to your desktop and right-click and select "Display Settings".. Scroll to "Scale and Layout", and then "Display Resolution". There, you will find the resolution of your monitor.Use these numbers to replace the first two numbers in each part of the ScreenModeResolution section. It should look something like this when you are done:
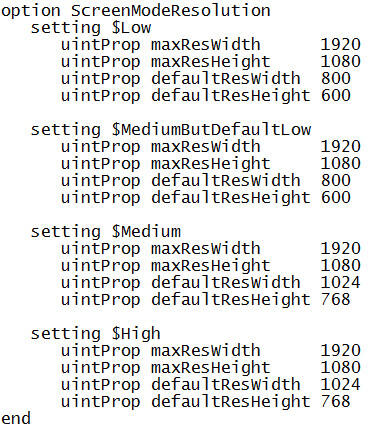
You can now run your game. Once you enter a neighborhood, go to "Options" and then "Graphics/Performance Options". You will now see many more options in the screen size settings, and you can pick which one suits your computer best.
MORE CAS COLUMNS
Adding more columns to CAS will make it so that your CAS interface will not cover up sims' faces on a wider screen.Here is a fix that you can download to solve this. You will have to scroll down one post in order to find it. As for which file to choose, it will depend on the resolution of your monitor as discussed above. Pick whichever file best suits your resolution.To install this fix, go to "Documents / EA Games / The Sims 2 Ultimate Collection / Downloads". If this folder does not exist, you can create one. Since it is a game-altering mod, I recommend making a specific folder to separate it from other custom content files you might download.If the result looks wrong the first time, simply close the game and delete the file from your downloads folder and try a different one.
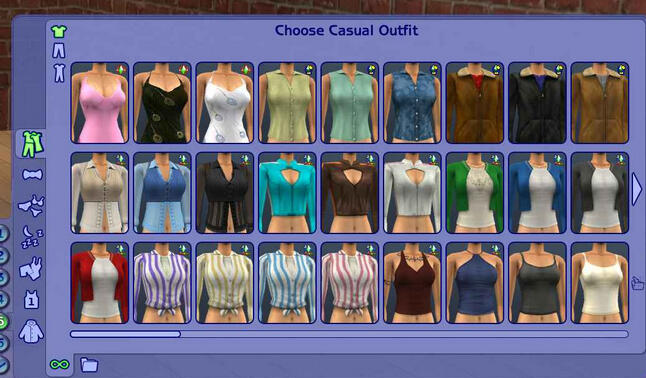
Now that we are finished fixing the game, it's time to move on to downloading custom content and mods!!
Custom Content and Mods !! 💙✨
DOWNLOADING CC + MODS
To download CC (custom content), locate your downloads folder. No, not the one for your whole computer- the one for your game!You can find this folder here: "Documents / EA Games / The Sims 2 Ultimate Collection / Downloads". If a downloads folder does not already exist, you should create one.This is where you will place almost all CC and mods that you download.I cannot urge you enough to make separate folders for each "type" of CC. This helps with organization, and prevents issues if you were to merge your CC. You should also always make a separate folder for game-altering mods (such as the "More CAS Columns" mod discussed in the "Essential Fixes" section), and default replacements.For example, you might want to make a folder for clutter, toddler clothing, unisex hairstyles, or kitchen appliances. The possibilities are endless, and you should come up with a system that works for you.
(imagine in your head, a picture of an organized downloads folder, which is something that i don't currently have)
Another thing to note is that having too many subfolders (folders with folders inside) will make your game load much slower. It is important to reduce the amount of subfolders as much as possible.When you install a piece of CC, if it's in a compressed file such as a .zip or .rar, you should extract it until you find the .package file(s) inside. If you place a compressed file in your downloads folder, the CC inside will not function or appear in-game. Once you have the package file(s), place it in your Downloads folder and it will appear in your game.If you are installing a piece of CC that requires a mesh, make sure you download the mesh, or the CC will not appear in-game. Additionally, if you find a piece of CC that says it is "slaved" or "repo'd" to another piece of CC, you should make sure you have both CC items downloaded, because it means that if the original CC item is not in the game, the other one will not appear.
DEFAULT REPLACEMENTS
Default replacements are CC items that replace existing items in the game. If there's an item of clothing in-game that you don't like, or you feel like the in-game hair is too messy, there are almost certainly a default replacement for these.However, =you can only have ONE default replacement of each item, installing multiple default replacements for the same item could cause errors when using the item.It's also useful to keep track of which default replacements you already have-- listing the ones you've downloaded in a Google doc is always a good idea.And, as stated above, you should always make a separate folder for default replacements, so they don't get mixed up with other CC.
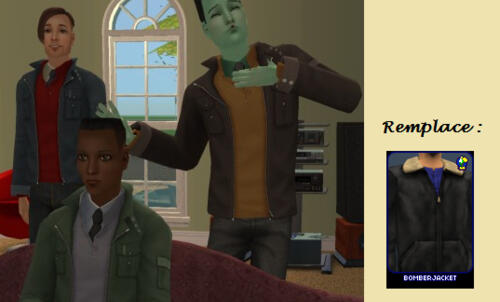
Here is a database of almost all existing default replacement options, now download to your heart's content!
WHERE TO FIND CC + MODS (personal favorites)
RECOMMENDED CC:
Lilypad Default Skin, Hypnotic Default Eye Set, Sweet Wonderful You Lipstick, Adele Nosemask, Winged Eyeliners, Cottage Eyeshadow, Golden Wings Blush, Chasing Miss Pretty Default Face Templates (And their nondefault version), Default Brows
GENERAL SITES:
ModTheSims, The Sims Resource, Pinterest, TumblrFAVORITE CREATORS:
-Deedee-Sims (the holy grail of TS2 hair + some clothes)
-Poppet-Sims (mostly hair, some build/buy objects)
-Linacheries (pastel recolors of build/buy objects + clothes)
-SkittlesSims (lots of 4T2 conversions of clothing)
-Suratan-Zir (mostly hair and garden/plant-related objects)
-LuaSims (TONS of recolors of in-game objects)
-MiniculeSim (TS4 "clay" style hair conversions + some clothing)
-Fakepeeps (all the child and toddler clothing you will ever want)
-Michelle (4T2 furniture and in-game object recolors)
-Lilith-Sims (Makeup, I like her nosemasks + eyelids in particular)
-Veranka (lots of build/buy objects, some of them are large sets)
-MidgeTheTree (lots of mods to fix certain issues in the game)
-PlatinumAspiration (mostly clothes converted from TS4)
-Spell-Bloom (mostly hair in the Poppet and Afterglow colors)
-Repository Project (add-ons for items to make a complete set)
-Keoni-Chan (clothes, hair, objects, and some defaults)
-LazyDuchess (mostly game mods, but a few other cool things)
-TheNinthWave (basically a little bit of everything!)Here is another list with several more creators, some of whom i haven't checked out yet!!
MERGING YOUR CC
If you find that you have downloaded tens of thousands of files and your game is running slower than ever, you can use this tool to merge your custom content.It should not go in your downloads folder.If you had 100 files of just lipstick, it can cut it down to only a handful of files. The game doesn’t necessarily read how big the files are when deciding how long it takes to load, it usually reads how many files there are. So, cutting down on the amount of files will make for a faster loading time, even if you have several GB of cc.To use it, open the application and click “browse” to find the folder of the custom content you want to merge. This is why I separate my different types of custom content by folder, as it makes each type of custom content easier to find, and it means that the merger will not accidentally include any other folders when merging.
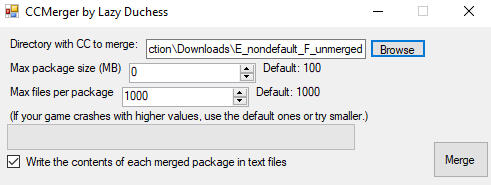
When you are ready, click the “merge” button and it will prompt you to choose a name for the files you want merged. Then it will begin the process, which usually takes a minute or so depending on how much you are merging.After you are done, make sure to close the program, and then you can delete the original files in the folder and leave the merged ones. This will make your game load and run a lot faster!Things that I’m fairly certain CANNOT (or should not) be merged:
-Fences/Doors/Windows/Etc
-Game-altering mods
-Sliders
-Face templates
-Default replacements
Installing Reshade !! 💙✨
Once you've had some experience playing TS2, you might want to give your graphics an upgrade. For this, you will want to download Reshade.However, I will say, I only recommend doing this if you have a really good graphics card, otherwise it will make your game very slow.To install it, run the Reshade .exe that you have downloaded. On your screen, it will show you an option to select a game or application. It should look something like this (although, it probably will have more applications than I do):
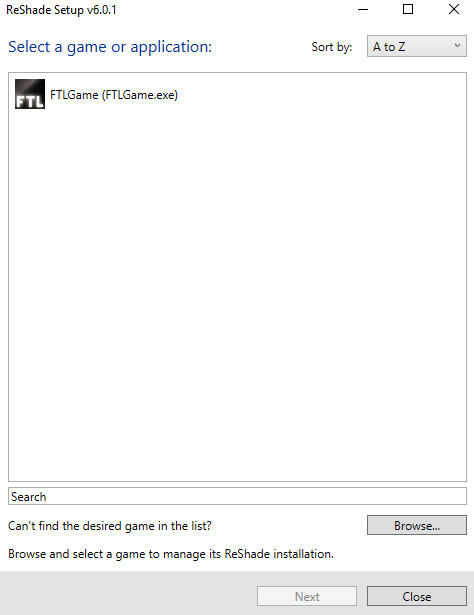
If TS2 does NOT appear in this menu like my example shown above, click "Browse" and locate (again): "Program Files (x86) / The Sims 2 Starter Pack / Fun with Pets / SP9 / TSBin".When you get to that Folder, find "Sims2EP9RPC.exe" as shown here, and select it:
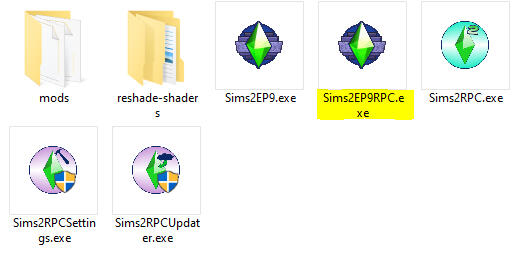
Click "Install" and it will bring you to a screen where you can decide which rendering API the game will use.For this, if you do NOT have DXVK, you will want to choose:
"Microsoft DirectX 10/11/12"If you DO have DXVK, you will want to choose:
"Vulkan"If you don't know whether or not you have DXVK, look in your TSBin Folder (as discussed above) and see if you have the file "d3d9.dll". If you have this file, you have DXVK. If you don't have this file, you don't have DXVK.
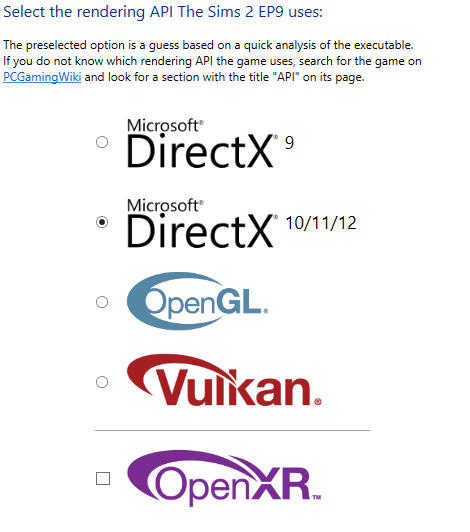
Once you click "Next", it will bring you to a screen where you decide which effect packages to install. Select all of them, and then press "Next" again.
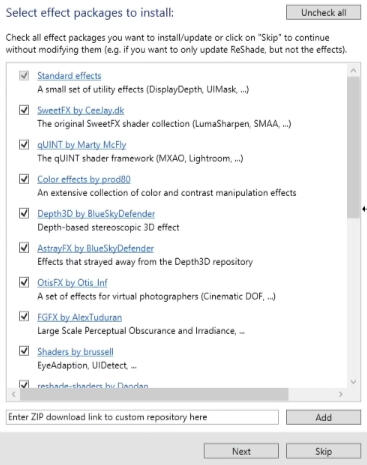
After you press "Next", Reshade will install, and then you can hit "Finish" when it is complete.Before you start your game, you will want to locate a file in TSBin called "dxgi.dll". Once you've found it, make sure you have file name extensions turned in in your file explorer (click "view" at the top of the page and select "file name extensions"). Then, you will want to rename "dxgi.dll" to "Reshade.asi".Move the newly-renamed "Reshade.asi" to the "mods" folder in TSBin. If you do not have this folder, you should create one.Now you should go to your Config folder (Located at "Program Files (x86) / The Sims 2 Starter Pack / Fun with Pets / SP9 / TSData / Res / Config") and open Graphics Rules.sgr with Notepad.If you increased resolution as instructed before, your file should have:
"seti Low 3
seti Medium 3
seti High 3"If you did NOT increase resolution, you will find that the section looks like this:"seti Low 1
seti Medium 2
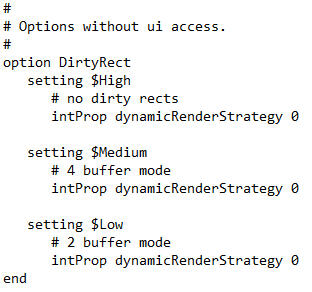
seti High 3"If it looks like that, edit the text in the file so that each of those lines has a 3 at the end of it. It should appear as listed above when you are done.After you have confirmed this change, Ctrl+F and search for "option DirtyRect". It should look as pictured here.If each line does NOT have a zero at the end of it, make sure you change it so that it does have a zero. After this, you are done with the file. Make sure you save your file before closing it.
Now, you should launch TS2 to make sure that it installed properly. If you see a bar for Reshade at the top of the screen, it has likely successfully installed and is ready to be configured.Once it is finished setting up, press the "Home" button (or, if you don't have a Home button, whichever button Reshade redirected it to) on your keyboard. This will bring up Reshade in a side menu.It will offer to give you a tutorial, which you might or might not want to follow.Choose the "Settings" bar at the top of the screen, and you're going to want to change the keys that control Reshade. I recommend choosing buttons that you don't often use on your keyboard for this.Here is an example of what your settings could look like:

After this, you can either mess with the different Reshade settings in the "Home" section, or you can download presets.Some of these presets include: Turniphead, Gia, and Dove 2.0.To install a preset, make sure your game is closed. Download whichever preset file you choose. If it says that the file can harm your computer, choose to keep it.Once installed, drop your file(s) into the TSBin folder where your game is installed.Reopen the game, and open your Reshade sidebar. Click "ReshadePreset" at the top of your Home section, and it will open up a small file explorer. Locate your reshade files, and press "Select". After you do this, it will change your game to look like the preset you installed.
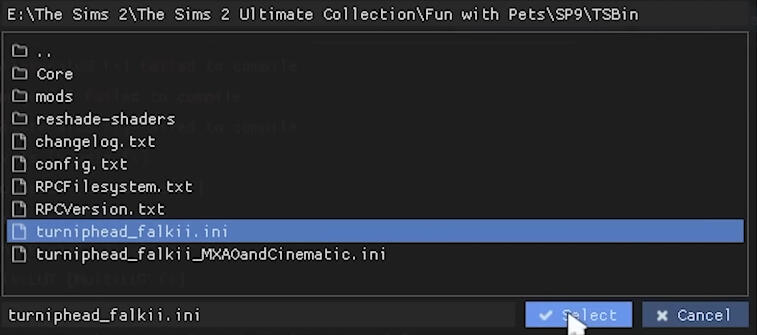
You can use the "Previous/Next preset key" buttons that you had assigned earlier in order to go through the presets that you've installed.Once you've decided on a preset, load a neighborhood of your choosing and go to "Options" and then "Graphics/Performance Options". Make sure that if you are allowed to toggle the Smooth Edges setting, that it is set to "Less".One more important thing that you should know is setting up a screenshot folder. Open Reshade and go to your settings tab. Go to the screenshots section and make sure that the button for screenshots is set to "Print Screen".Find "Screenshot path" and click on the folder. Then, choose a folder in the file explorer as a destination for all of your saved screenshots. I recommend making a specific folder for this purpose, but you can save them basically wherever you want.

If you're having trouble using Reshade, such as having flashing effects, here is a helpful tutorial on how to fix said issues.You are now finished installing Reshade, and your journey installing and fixing The Sims 2 is now complete! I want to give a special thanks to all of the simmers who put together tutorials that inspired this carrd, such as OSAB, PleasantSims, ACottonSock, Wee Albet, LazyDuchess, and this (deleted) Reddit user. I hope everyone will enjoy this game as much as I do, and have fun!!